Sunday, December 8, 2013

That time everyone got married in one year

This year we were invited to 10 weddings, along with our recent puppy addition of Scout has somewhat throttled our house-progress over the past couple of months. Halley's mom, Jeanne, says that we're not allowed to make any more unmarried friends.  Somehow we found the time to sneak a few projects in, so we thought it was time to smush them all together into another blog update.

The adorable Q-tip tree
Last summer we spent a silly amount of time and effort cleaning our pool of pine needles dropped by the pine tree in the corner of our yard. We decided the tree must die. So Halley's dad, John, offered to take it down as a birthday present.  With the help of my dad, Jim, and friends Brian and Lina we got most of it taken care of.
Of course the tree's base is in the corner of the yard where falling limbs would hit the fence, pool pump or pool cover.  This required attaching a line to each cut branch and lowering it safely to the yard.  We were able to get about 75-80% of the limbs off - but finishing the job is going to be difficult.  There is no other trees to hang lumberjacks off of or to use to catch cut branches.  The operation is going to be tricky with a higher likelihood of someone getting hit with a falling limb, so we called it quits on the project - much to John's chagrin.  We'll likely get a tree company to manage the rest of the job and handle the dead/dying tree outside of the fence.  The significant pruning really did reduce the amount of debris in the pool over the summer.


Painting the foyer
We decided to paint the foyer and the upstairs hallway a dark grey because we have really a lot of colors going on and didn't want guests eyes to be assaulted upon entry.  The new color sharpens things up nicely.

View to kitchen before
View to kitchen after

View to foyer before
View to foyer after

Upstairs hallway before
Upstairs hallway after

Montage of yard work
There has been tons of pruning and shrub removal over our first two years in the house.  What we thought was a tiny amount of fenced yard, really increased once we got the foliage in order (although we'd still like to move the fence to include more of the property).

View away from Norman Drive before
View away from Norman Drive after

View across pool before
View across pool after


View to Norman Drive after
View to Norman Drive before


View to Tom's house before
View to Tom's house after


Gardening up a storm
We had a productive year in the garden with a harvest of 38.75 lbs of organic produce.  We enjoyed eating it and sharing with friends and family.
The scene: potatoes, corn and garden boxes...watered with captured grey water from the downspouts.  Not a drop of hose water was used on the garden.

Corn!  Not a huge success so we'll probably grow
 something else here next year.
The garden boxes


A modest ear of corn
Ripening Big Boy tomato - probably
used on a burger
A cucumber, nearly ready to pick


Thai hot peppers were planted in each box to keep deer and
rabbits from crunching on our veggies - and it worked!
Potatoes that I killed by trying
to trellis them: lesson learned


Cascade hops growing along the side
of the house.

Close up of the Cascade hops

Cantaloupe trellised on the fence.
The flowers and melons that managed
to grow on the outside of the fence
fed the deer nicely.
Compost pile with volunteer tomatoes.


Monday, April 8, 2013

Spring has sprung

Mini Kitchen Remodel
In our Brady Bunch-chic kitchen resides one of the dumbest set of cupboards in existence.  When standing at the sink, one has to stoop to see people sitting at the kitchen table.  Not only are the cabinets too low, there appears to be an air-filled soffit above them.  In a few years we'll remodel the kitchen and take down the soffits, but until then I cannot handle the cabinets.  We won't lose any storage space when we rip the cabinets out because we converted the wall oven area to cupboard.
Dumb

Dumber
The cabinet was secured with just a few heavy duty bolts into some 2"x 4"s mounted to the ceiling.  The damage was repaired with some spackle and paint.  There is no way we would be able to match the paint color in the rest of the kitchen, so it will have to do for a while longer - but having the cabinets gone makes us so happy.
Everyone keeps chairs on their counters, correct?

Much more open and far better.  Immediately after the
completion of the project I applied a layer of debris to the
exposed counter top.

Mailbox
Our mailbox before was white, with numbers on only one side and a mildewey post.  We painted the box, stenciled some numbers on both sides (!) and painted the post.  An easy upgrade that looks much better.
Fire-engine red for the win
Grow all the things!
Our first summer in the house was spent getting trees and shrubs in order.  This summer we're working on a proper garden.  Next summer: chickens.  I want to do raised bed, square foot gardening.  We decided that our lawn is garbage anyway, so may as well ruin it by growing corn.  The minimum area required is 10' x 10'...and since we're rototilling, perhaps we should have some space to grow potatoes.  So the project spiraled into what I'm calling the Oyer Family CSA.

To build the raised beds I considered pressure treated lumber (not nuts about the idea of the chemicals in the growing soil) and recycled timber (Trex).  The cost of the Trex was so high we couldn't bring ourselves to load the 8' $20 lengths onto the cart.  The next best idea we came up with was using reclaimed lumber from pallets.  It's not pressure treated so it will eventually decay, but at the cost of free it's hard to argue.  We got some pallets delivered from the Princeton loading dock (thank you Dave!) and found that the Sear's by our house gave us cart blanche to take pallets whenever we want them.
Before
After
Corner detail
Borrowing my Dad's rototiller turned the project from a multi-day affair into something we accomplished in a few hours.  We tilled the grass into the dirt to keep the organic matter in the soil, but mostly because we tried removing the sod and found it incredibly time consuming (read: we were lazy).  After the initial till at around 12" depth we spread manure over the area and tilled it again to a 16" depth.  I'm sure we'll have some grass and weed issues, but we'll deal with them as they show up.
The layout.  Some of the limbs on the trees to the left of the garden will get pruned so they don't smack us in the face while we mow and also to increase the amount of sun the garden gets.

Seedlings, getting started!
Our veggie roster:
  • Thai chili peppers
  • Sweet peppers (of five different colors!)
  • Big boy tomatoes
  • Cherry tomatoes
  • Spinach
  • Summer squash
  • Carrots
  • Cucumbers
  • Sweet corn
  • Pole beans
  • Potatoes (two varieties)

The flower list, mostly perennials unless otherwise noted:
  • Hollyhock
  • Chinese lantern
  • Foxglove
  • Johnny jump up
  • Black-eyed Susan
  • Lupine - We had the book Miss Rumphius growing up and loved it, despite calling it The Lupine Lady which isn't even close to the real title
  • Marigold (annual)
  • Morning glory (annual)

Of course we chose some difficult specimens (hollyhock, foxglove and lupine) so it will make for an interesting challenge.  We'll try to do more frequent updates as the projects start to pick up again. 

Saturday, February 23, 2013

Potpourri

Drain the pool


When we closed the pool in September, we were told that we would need to drain some additional water out later in the year to prevent damage to the pool.  The goal is to avoid getting the water level high enough to enter the pump outlet lines and freeze, or freeze at the level of the tiles and pop them off the wall of the pool.  We promptly forgot these instructions, fast forward to a recent snowfall.  I was standing at the back door, enjoying a cup of coffee and watching Molly frolic in the snow...and noticed there was a perimeter of snow around the edge of the pool cover and not in the middle.  We pulled the cover back and the water level was well into the tile work.  Thankfully the weather had been pretty mild so we weren't in total danger of major pool damage, but we did need to fix the problem.  Luckily Home Depot rents serious submersible pumps, but they were super suspicious about needing to drain a pool in late December:
  • "Yes we know, this isn't the right time to fix the problem"
  • "Yes, we're novices at pool maintenance"
  • "Yes, we're technically grown ups"
The level we were told to shoot for was level with the surface of the second step down on the steps at the shallow end.  The pump came with a 50' hose, which wasn't nearly long enough to reach the curb.  We ran the hose as directly as we could (under the fence) to the curb and supplemented the length with two downspout extenders.
Fence being propped up with a log so as not to puncture the hose

The definition of a "kludge"

I threw a piece of moldy plywood from the kitchen wall
reno demolition under the last downspout extender to
cover the last bit of lawn to the curb
Christmas gifts

Matt and I managed to say that we were not getting each other gifts...and actually stuck to it.  The trip to India counted as anniversary/Christmas/birthday gifts.  Despite this, we still think this was our favorite Christmas on the books so far.  We are slowly paring down the number of houses we have to visit from 7 (2010, spent 100+ miles in the car according to Google Maps), to 6 (2011), to 5 this year - a manageable number that my mother says won't decrease until we have kids and can start laying down the law.

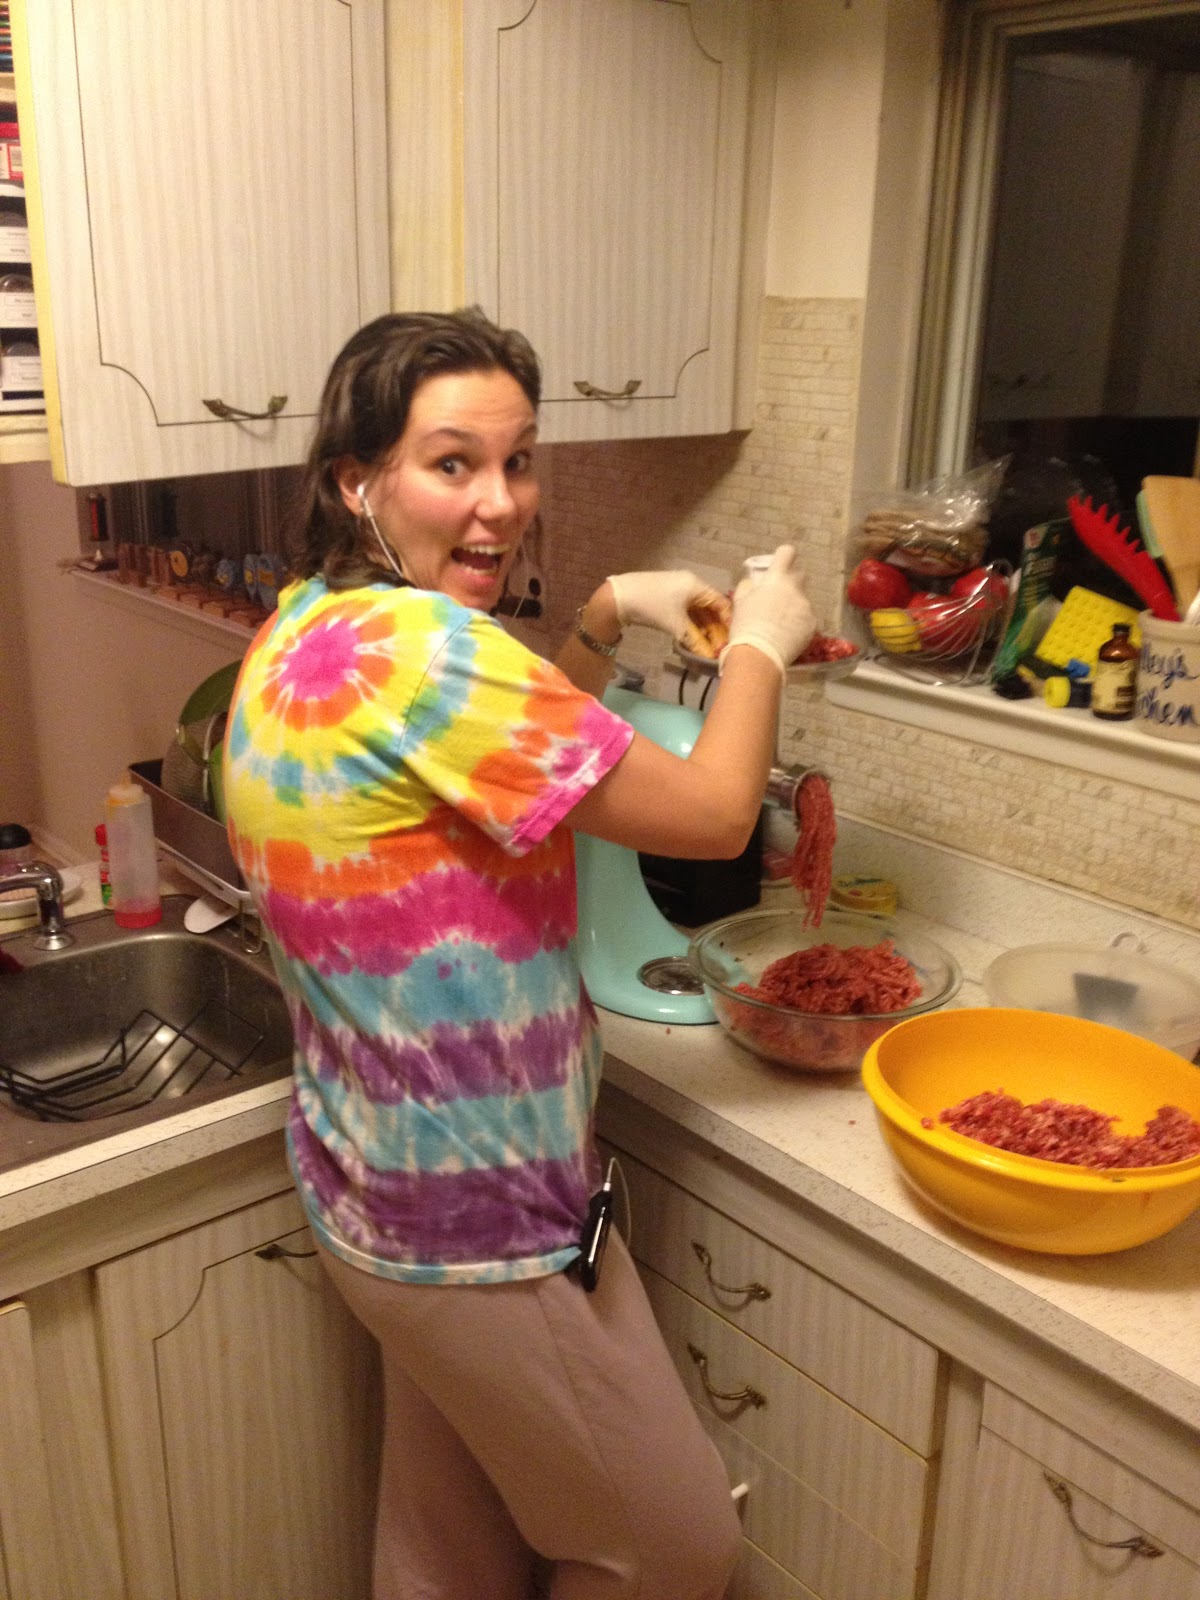
We got some great gifts from our families!  A meat grinder from my mom, a dehumidifier from Matt's parents, and some renovating cash from my dad.

Perhaps a little too enthusiastic about
grinding some pork for breakfast sausage
Poised for continuous drainage into the
sump pump pit.


Lost Earring

I cleverly dropped an earring down the sink - thank goodness for "P" traps!  We are now a professionals at retrieving earrings, as Matt and I took apart a sink at my mothers house on our wedding day because I dropped an earring I was supposed wear that day into it.  Not tricky, but you can't help but feel like a bone head for dropping the earring in the first place.

I'll call these my plumbing pajamas
Bonus points if you can see the earring

Removing The Electrical Line From The Old Oven

After removing the old wall oven, we had a floating 220V line and temporarily threw some wire caps on the end (and left its breaker off) We decided it would be best to remove the line entirely, and free up 2 breaker spots in our circuit panel. We ripped out the staples securing the line, and unscrewed the line from the breaker giving us a free 30A 220V breaker, or if removed two 15A 110V's.


Light Switch Timer

We have four light switches by our front door, the first of which controls the light on the front porch.  It would be ideal to have the light controlled by a timer so we don't have to turn it on or remember to turn it off at night.  Timers require an opening big enough for a toggle switch, not a traditional light switch.  We needed to use the internet to buy a 4-gang switch plate cover with one toggle opening and three switch openings.

We tried a few timers before finally finding the right one. We ended up using a nice programmable digital timer, the Intermatic ST01. We are using an LED light bulb so we needed one that specifically had a relay inside (most of the cheaper ones use something called "PWM" to turn the light on and off), but this won't work for LEDs.


Wednesday, January 2, 2013

"This is looking less shitty by the minute" ~ Matt Oyer

Oven project
Looking a little bit like Dexter
This past Saturday started with no plans (aside from sitting around and doing a few errands) until Halley suggested we finally rip out our dysfunctional wall oven. I was a little surprised, but enjoy spontaneous demo as much as the next guy so we started smashing stuff.

It started with a bit of "exploratory breaking junk" (which didn't really go so well, it turns out there was a stud directly behind where I swung the first hammer. We tried again with a bit more success and proceeded to poke around. We found it was mostly empty (thankfully) and our idea of replacing the antique with some DIY shelving.

What were they thinking with this electrical line?
We took out the oven, pulled the 220V line down into the basement (deal with later, for now we just capped the line and left its independent breaker off) and tossed the oven to the curb. With the oven out of the way, we proceeded to sawzall/hammer/pry/karate chop the rest of the studs and supports to leave us with a nice clean slate to do some terrible construction work.


Living proof of the "do your best, and
caulk the rest" motto
We lined the walls with plywood, and made the shelf supports from 2" x 2"s. The previous electrician took a shortcut and just ran the electric to the wall outlet (for the fridge) on a diagonal, so we decided to take a short cut (mainly because this is a temporary fix until we gut/redo the entire kitchen) and just place one of the shelves directly on top of the electrical line to hide it. We found ourselves saying "I really don't care that much" a little too often during this project, which resulted in a lot of caulk and great stuff being used to hide things.

After all the shelves were in, we mounted drawer slides to another piece of shelving for the bottom shelf. The shelf material we had wasn't deep enough, so we scavenged and found a test piece of oak (we had from the steps we made for our living room - I don't think we have anything about those on the blog, we should put a picture here) and added that to the end (we were lucky it was just about the perfect size)


Once this was all done, Halley decided she wanted another shelf, so we took them all down, and re-spaced them out for four shelves. We then threw some molding around the edges, and a curtain rod/curtain to complete it.  The curtain will be hemmed so its not sweeping up the debris on the floor.

Shelving in..
...curtains up...

...kitchen gear inserted!


Time lapse of the whole project.  There are segments where we're both off camera...because we're in the garage cutting plywood, 2" x 2"'s or melamine shelving.


Monday, November 12, 2012

Fall fun

Yard Work

By the time word of Hurricane Sandy got serious, we already had many leaves on the lawn.  Wet leaves are a pain to handle so we wanted to make a dent in the fall lawn management.  We were afraid to pile them in the street because we didn't want them washing into and clogging the storm drains.  The last option, which was luckily the laziest, was to just run everything over with the lawn mower at the lowest setting for the last cut before winter.

Matt was breaking down and bundling up some branches while I got started on the mowing. All of a sudden I hear a loud bang and the lack of "lawn mower" noise.  We have some exposed roots in our yards that I am terrified of running over, so I give them a wide berth.  There was one gnarly bugger who was hidden under a few leaves.  It stopped the engine in its tracks.

I ran out to a local garden store (Home Depot didn't carry the blade we needed, but laughed politely when I held up the damaged blade) and we replaced it that afternoon. Thankfully we didn't bend the center shaft.

Molly, trying to get primal
Earlier in the week we were moving some piles of brush we had stacked up. Our garbage company takes bundles of sticks four at a time for free, so we've been buffering them. I decided a pile of sticks would be a very happy home for some local wildlife and that we should break it up into smaller piles. So while we were doing this, and out from one of the last piles ran a small vole. The next 30 minutes were spent watching Molly tear around our yard chasing it.  The vole ran outside the perimeter of the fence multiple times, just to run back into the range of Molly...voles must not be known for intelligence.

It finally got stuck in a window well, and we were able to shoo it into a bucket. I then drove it over to the nearest field and let it loose....while some people watched me awkwardly from their back porch.

We have half an acre of property and a good chunk of that is fenced (around the pool) so dealing with leaves has been a pain. We decided to tap out and get an industrial backpack style gas powered leaf blower. (Husqvarna 150BT)

Not only is it fun, but it works great :) we made quick work of the backyard today.


Hurricane Sandy

We don't have a battery backup for our sump pump so we decided to make one... sort of. We went out to Pep-Boys and bought a car battery (the same style that goes in both of our cars just in case one dies we can use this - multipurpose!) and Matt connected it to a 750 watt inverter he bought for his "silly project car" he worked on a while ago. We periodically checked the pit once we lost power just in case, but it remained dry throughout the storm luckily despite the yard around the house pooling with water.


Our other hurricane prep included moving everything off of the floor in the garage, the down spout extenders were all attached, and we had enough halloween candy.  We only lost power for two days and were able to keep our fridge and freezer at temperature.


Wendy's for dinner by candle light
First Spare Bedroom

We finally finished the first bedroom. We put the final coats on the doors, and replaced the window locks. One lock had come off and removed a large enough chunk of wood to make it not possible to replace easily, so we just put the lock on the right side of the window. Function over fashion. We plan on replacing all the windows in the house at some point, so this is really just lipstick on a pig anyway.

Sunday, November 4, 2012

GLaDOS Pumpkin tutorial

How are you doing, because I'm a pumpkin

In addition to the light show we wanted to carve some pumpkins. While looking for ideas (and seeing other peoples pumpkin's Dustin gave me a great idea of making a pumpkin sculpture of GLaDOS (an AI robot from the awesome game Portal... even if you don't like most video games, I can all but guarantee you will love this game do yourself a favor and play it)

Like with most of my crazy ideas, Halley was skeptical at first, but was soon on board. We used three pumpkins of small, medium and large size (we had to redo one of these as it rotted before we could use it).

I started with a 3d model I found online  We used this for our inspiration.


Starting materials after a rough initial shaping

There are three main shapes to her: her head, bottom and back, each larger than the last. All of these shapes are spherical, so look for relatively round pumpkins. We carved these large shapes first, then used what we had left for "cables" and other details. (the cables are just thinly cut strips of pumpkin)

Prepping for the overnight
bleach solution soak

We wanted to make sure this would last so we read a few articles (here's a comparison) on how to preserve carved pumpkins the longest, and most people agreed to use a mixture of bleach and water.


Once we  had the shapes cut out, we started on the detail work for the large pieces. We used the 3d model again for inspiration. Doing her face out of a single piece exactly didn't seem very doable, so we decided to represent negative space by removing the pumpkin skin. The only place we actually cut all the way through was the eye (We wanted to put an led from my light show here, and didn't want to be bother by carving it super thin)

The other large pieces were ellipses with "wings" so we drew the basic shape onto the pumpkin, carved it, then skimmed off a thin layer on the "wings" to differentiate them from the main piece.

For the sides of her head, we used her finished head as a template to draw the needed shape onto the side of a pumpkin scrap. The design was Halley's interpretation based on the 3d model above.


Drying pumpkins
After carving the detailed pieces we laid them all out to dry.
GLaDOS hangs from the ceiling, so we wanted to do the same. I used some left over electrical conduit I grabbed from work (we had some electrical work done recently, and the electricians threw out a couple of longer bent up pieces.) We put the conduit in between two cinder blocks and shaped it with a sledge hammer carefully.

Once we had it in a nice "J" shape, we put the largest of the three pieces on her. We just shoved it through the pipe and friction held it in place.
Tiny holes and twine to secure the middle
body section

The second piece was a bit too small to do this, so we put 4 small holes through it, and tied it on with twine 

The face we wanted to sit on the end, so we used a dowel shoved into the back of her head (close to the pumpkins stem so it would be sturdy) and put the dowel into the conduit.

After the main pieces were on, we just took a bit of "creative license" and added "wires" wherever we felt, and adhered them with small nails.


The Final Product


Tuesday, October 9, 2012

Outdoor fun and finishing another room

Gutter Guards

When we saw a tree growing from our gutters we knew it was time to do something about them. We only wanted a band-aid as we plan on replacing them entirely when we get a new roof, so we decided to get the cheap roll of plastic mesh you jam in the gutters.

Halley worked on the shorter roof (above the garage) while I went up on the main roof. After cleaning out all the gross junk in the gutters, we started cramming the gutter guards in. They fit in with pressure/friction and bow out a tiny bit because of that (by design).

How well will they work? Who knows!  We'll find out soon enough.


Pseudo Landscaping

Before
After ripping out all of the bushes on the side of the house, we decided to move the line of bricks that surrounded the "flower bed" that was already in front of the house. We had already planted some bulbs, various ground cover perennials.


After
We bought about 60 new bricks and wove them in with the existing bricks to lay out a new outline that looked a little nicer to us. Given that we are not professionals there is a bit of "wiggle" to our "straight" lines... I'll chalk that up to "charm". 


Before

After

Bedroom Repaint
We decided it was time to start in on a relatively low cost project and tackle the first spare bedroom.  Eventually a tiny human will live there, but for now it will serve as a guest room.  At some point in the future we'll get the hardwood floors in the house refinished, but that is a project for another time...perhaps decade.  We were clever enough to set up a time lapse for the work on most of the room (except painting the baseboard and trim).  


We followed our now standard procedure for the bedrooms:
  • Use oil based primer to prevent the wallpaper from bubbling up and falling off the walls (learned that trick from the debacle here)
  • Put up crown molding and caulk our mistakes
  • Paint ceiling and crown molding
  • Paint walls
  • Rip up carpet and remove tack strips and staples
  • Paint baseboard and trim
  • Call it a day, eat cheetos


Nearly "after", still need to paint baseboard, trim and doors.