A blog to chronicle the trials and tribulations of house noobs attempting to tackle every home improvement project under the sun with some help from family and a lot of googling.
I Am Terrible At Estimating Things
The day we were to go purchase the tile, I insisted that we take two cars to Home Depot in order to transport the tiles home. I have a 1999 Honda Civic, and Matt has a 1991 Honda Civic so we really are able to transport big stuff easily. We calculated the number of cases of tile we'd need to be 60 and the sales person started laughing when we told him how we were going to transport the cases. At 80 lbs per case, I wanted to carry nearly two and a half tons of tile in two sedans. Plus another 475 lbs of mortar and grout. You too can now take this opportunity to laugh. Delivery was $75, and a fantastic choice. The cashier says we were wise to do this because she had seen more than one person break their car axle trying to carry too much stuff. I'm not even sure the same volume of styrofoam would have fit in two Civic's because 60 cases turns out to be over two pallets of tile. Cripes.
Tiling Like We Mean It
Uncle Don and I getting started
Our Uncle Don was so kind to set us up with tile saws, a power drill that can handle mortar, the mixing paddle and most importantly knowledge. The tiles we bought were 16" x 16" monsters, with some variation between boxes which we figured out after a few courses of tile were laid. We chose a diagonal pattern because I think it looks more interesting than a grid that is square to the room. Speaking of "square", our house has only a passing familiarity with this concept. The corner behind the door in the adjacent photos is probably 105 degrees instead of 90. This would have been super obvious if we went with a pattern aligned with the walls rather than the diagonal.
At the peak of tiling we had six people working, including Matt's parents Jim and Pat. To make our lives easier we decided to put off the tiling of the corners and closet for a day until the mortar set on the adjacent tiles. Tiling the closet was tricky, but we did a complete dry fit to make sure the plan would work. We didn't get too lathered up about things looking perfect in the closet...because it's a closet and we have plenty of other details to be concerned about.
A real treat to tile the closet
We all went for a dip in the pool afterwards, getting warmer but it's still "brisk"
Tile spacers, times a million
Done!
Molly, happy to be allowed back into the room
This week Matt and I have been grouting after work, photos to follow. When the home depot salesperson asked what color grout we wanted, I proudly stated "dirt". He politely informed us that this was called "earth". We chose a dark colored grout, because I don't want to spend the rest our lives trying to keep the grout white.
Greening the Neighborhood
Mature White Fringetree
Kim Fuller, a former lab member and current friend and neighbor, is a post-doc at UPenn. They have a great program where they give away one free tree per year to faculty and staff. Kim and her husband Brad's house has plenty of trees so they offered the tree to us. Kim and I picked one up this last Saturday, after a quick trip to a Chestnut Hill bakery for breakfast and cupcakes. After shoe-horning the tree into the mighty Honda Civic (their new tagline: When you think of large transporting capacity, you think Honda Civic), I was too excited/too busy chatting to pay attention to the speed limit. I got let off with a warning, thankfully, and crept the rest of the way home at a snails pace. We chose a White Fringe tree which will grow to ~30 feet high and have an equal spread. It blooms in late summer with tiny fragrant white flowers. Matt and I planted the tree yesterday in a spot where there used to be a tree. The ground was nice and soft thanks to all the rain...but mostly because we had the stump ground a few weeks ago.
Our White Fringetree, landscaping to follow soon (a keen eye will be able to see our neighborhood bunny, who Molly would love to get to know)
This weekend we will have our first weekend off from house projects thanks to the annual Harper's Ferry camping trip with my extended family (clocking in at ~30 people this year). I am looking forward to not being covered in paint/mortar/grout for a few days. Its a well deserved break.
When we bought the house, we knew there would need to be some upgrades to the appliances. We didn't realize how quickly we would need a new range. There was a gas cook top with only two of the burners barely "functioning" and an electric wall oven that barely crept to 250 degrees when being preheated to 400+ for over an hour.
I really like baking and fell in love with this monster after a lot of research. It has dual electric ovens, the bottom of which is convection, for super even baking. The burners are gas, because that is top notch for stove type applications. I couldn't find it at the local scratch and dent stores (there was no way this would cross the threshold of our house at the list price of $2,500). I eventually found on for $1,300 off with free shipping at a Sears in Minneapolis. Sold! Once we got it in the door, we opened the installation manual and found that the ovenator draws a minimum of 40 amps. Since our panel is only 100 amps and our inspector recommended that we upgrade the panel at some point, we decided now would be a great opportunity.
Today, after over a month of wrangling our electrician, we finally had the appropriate connections to set up the range. Although this represents only half of what we hired them to do, PECO refused assist in the upgrade of the supply line to the house which requires some digging due to all the rain today. Not a drop has fallen here since the wee hours of the morning and it is currently sunny so you can probably imagine my eye twitching with frustration. PECO did do us the courtesy of stopping by in one of their huge trucks just to make sure we weren't doing the project today. Not sure why that was necessary. The upgrade of the supply line to support 200 amp service is scheduled for May 29th, barring any other foul weather.
Anyway the range is installed and I can bore you with the saga of our electrician another time. Now is time to make a cake for dinner (yes that will be the only menu item) and dance with excitement of our success.
This week we played a game called: "Structural component or not?" I had been pestering Halley for a while to agree to take out this decorative divider between the Pit and the kitchen. Halley finally agreed, and we broke out the sawzall to destroy this annoyingly unfunctional "decoration". Once we cut through it and pulled it apart, it came down about an inch with some decent force... "What have we done"... I immediately assume this is load bearing due to how much force it was bearing... We spend a good half hour pondering this, and decide to contact a structural engineer... While we were waiting for them to get back to us, Halley posted pictures online in hopes that friends and family could weigh in. Brian Ell, Ralph Ratcliffe, Pete Campagna, Jeff Ratcliffe, and Rich Hart all agreed that this was VERY unlikely to be load bearing. We had checked the joists on the Pit side, but I had forgotten to check on the house's side. I checked with a stud finder and found that the joists were parallel... So we removed it with a clear conscience.
After, also there is now paint
Once removed, we found a pleasant surprise we will have to deal with in the upcoming years. Our kitchen has multiple layers of linoleum. Hooray!
Layer linoleum cake and sloppy
joint compound
Sunday was our first actual party hosted. We had 13 people over and cooked on the grill (since our oven/electric is still being worked on...hopefully this Wednesday). John and Dave came over early and the gents and I hopped in the pool. It was... a bit chilly :) but John would call it "refreshing."
John and Dave immediately broke Halley's rule of "no flips". She struck a compromise and they agreed to only do acrobatics off of the diving board and straight out into the pool. Photo credits to Dave.
Make sure to click the "gear icon" and select 720 to watch in HD
Almost immediately the aquatic acrobats determined the diving board was too "squishy" so John and Dave took it apart and tweaked it a bit tighter. Kids may not get as big a bounce, but now it's perfect for adults.
Last week we forgot to post some of the other projects we were working on. We planted some nice perenials, and hosta out front. The grass we put down is coming up great as well! Hooray for a week straight of rain!
We had also found some pretty cool blinds a while ago but forgot to post them here as well.
They have the "hex" design to insulate, but as you can see, they can go up from the bottom, but also down from the top for letting sunlight in while still having privacy!
We gota lot done this week! I am really proud of our work and meeting our deadline of having the house ready to host a mother's day dinner for 13 people.
Crown Moulding
Damn you, angles gamma and alpha!
There is math here that we had no idea how to deal with, goodness gracious. The math gymnastics stem from from the fact that the angles between the wall and ceiling and the moulding are not 45 degrees. Our angles were 58 and 32 degrees, which required strange saw adjustments in order to allow us to lay the moulding flat on the saw's table surface for the cuts. We have a fantastic power mitre saw that is capable of also bevel cuts. For a mitrecut, you adjust the blade relative to the vertical fence of the saw. For a bevel cut the blade is adjusted relative to the horizontal table of the saw. Based on math that wasn't obvious to us, we needed a bevel of 33.9 degrees and a mitre 31.6 degrees. It took us a while to get the first board properly cut, and a few practice cuts. Then begun the challenge of nailing through the moulding into the ceiling joists and the wall studs. After putting up a few nails to hold it in place, we let go of the moulding and stepped back to admire our work. The moulding promptly fell off and we promptly got into the car to go rent a finish nailer.
Matt went into Home Depot to get the supplies and I stayed in the car with Molly. This is when he got the demo of how to avoid nailing our hands to the ceiling, and an idea of how loud this thing is. He was clever in setting me up to fire the gun for the first time, and recording the result. It's loud, and a little scary to fire. Once the matter of securing the moulding was handled, we went back to figuring out the angles. After messing up a few more cuts, we decided to use a cheater method of simply holding the moulding against the saw's table and fence the same way it would be oriented relative to the ceiling and wall respectively. This allowed us to have just a 45 degree mitre and zero bevel, muuuuuch easier. We finished the moulding up that late night and were pretty happy, until we opened the back door to bring Molly inside.
Matt called for her and we turned all of the lights on outside to find that our backyard was dog-less. Further complicating the matter is the fact that our street has buried electrical lines, so no street lamps. Being calm under pressure, I bolted out the front door honking a squeaker tennis ball, crying and yelling for Molly. Matt, who smartly took a flashlight, found her in our neighbors yard who's property backs up to ours. She was panting and happy and had no idea why we were so lathered up, after all she had a fun romp through the neighborhood. We've since reinforced the area of the fence she got through.
The start of the end
What would a project be without
all of our tools to trip over?
Hello, Orange!
Because we're not professionals, some areas of the crown moulding needed some serious caulk. There was only one seam that wasn't in a corner which made our lives a little easier. We did two coats of ceiling paint on the ceiling and crown moulding, then it was time for color!
We are so happy with the color, its exactly what we wanted. We're ordering the tile today or tomorrow and shrewdly using a competitors coupon to get 20% off our order which is a huge help. We'll have a tiling party once we get all the supplies, let us know if you'd like to join us for a day of rolling around on the floor (we'll even feed you). Amateurs welcome because it will be the blind leading the blind.
Exhibit A: a happy painter
Quick screen solution
Magnets to be sewn along bottom,
sides and middle seam.
This is how Molly relaxes after
a hard day's work.
I have run through a few screen doors, as has my brother, as have our dogs. I didn't want to have screen doors on the french doors between the Pit and the pool deck. Two of these weighted screens seemed like the best option. They secure with velcro, but we plan on upgrading this by sewing some of those fantastic rare earth magnets (how do they work?) in key places. Molly is fine going through them, but has been trained to wait for us at open doors. So even when the french door is open, we still have to give her the go-ahead to exit. This doesn't stop her from running back through them into the house immediately after a quick dip in the pool.
Mother's Day
We finished touching up the paint job at 11:00 on Sunday morning then started a flurry of cleaning to prepare for a Mother's day dinner. We had 11 people over: parents, siblings and spouses and aunts. Our guests graciously helped us by bringing sides and desserts which was huge because we are still oven-less (hopefully by the 16th, fingers crossed). We made herbed pork tenderloin on the grill and a rhubarb currant chutney, cucumber salad and a regular salad. Also on the menu was appetizers, mashed potatoes, citrus rice with carrots and candied walnuts, ravioli salad with pine nuts, tomatoes and olives, rice pilaf, and pound cake with strawberries and whipped cream. If I forgot your contribution, I apologize.
My brother John and cousin Dave came over a little early to take a maiden dip (voyage?) into the still frigid pool. David recorded the temperature on the digital thermometer at 66.6, fitting to say the least. Molly joined them in the water, as did our mother's dog Olive, or Violet as only my brother calls her. Olive didn't really seem to enjoy the water too much, her coat is incredibly heavy when wet so she probably couldn't swim too easily. Matt hopped in too, but I still think it needs another 5 or 15 degrees to be an appropriate temperature.
Matt and I had a great time, it makes us really happy to have a house full of people we love and feed them good food. After all, isn't it great to eat with friends?
The pool was scheduled to be opened May 1st, so when we came home from work we were pretty excited. We had only seen glimpses of the pool by peeking under the cover, so we had no clue what we were in for. This is what we came home to.
The Black Lagoon
We could barely see 1 foot into the water. Halley was so excited by seeing there was a real pool under the cover that she decided we had to rent a power washer that night to clean the pure evil that has built up on the concrete around the pool (see the black in the bottom left of the first picture).
We set out to Home Depot to pick up the power washer and picked up a few other things as well. (baseboard, crown molding, quarter-round for the Pit, and a surface cleaner that was supposed to clean concrete more evenly than using the wand). After getting a quick tutorial, signing all the red tape and getting the truck home it was around 7:45. We get all of the equipment out of the truck (of course rented because we cannot haul anything of significant size in our Honda Civic's), and follow all of our training meticulously. We try the surface washer first, which does nothing... The saleperson had openly admitted that he gave us an underpowered power washer for this surface cleaner, but he assured us that it would work fine.
Low visibility, check
After a few minutes of sad panda faces, we move to the wand that came with the power washer and we couldn't get the fitting onto the hose. Without getting into cross section diagrams... the pieces fit together, but it would not "lock" into place. We fought with this for 30 minutes, called Home Depot, and took it back that night...grumpily.
This was our very first full day fail with our house. We've had fails here and there, but we've always had at least one "win" during the day to sit back on.
The pool guy let us know he was coming back Wednesday to do some more cleaning, so the pool looked much better when we got home.
I can see the bottom!
We finally find out what the stairs look like
Getting better
Halley cut out early to go back to Home Depot and redeem ourselves. I came home and saw the Home Depot rental truck in the driveway. This time we got the larger power washer, and the surface cleaner still worked terribly. Sad faces again :-( We move onto the wand, and once again it doesnt fit. Halley goes back to home depot, and it turns out the salesperson is color blind and was putting the wrong O-ringin the fitting... *facepalm*
Halley gets back with the new wand, and we're ready to go. In order to start the power washer you need to be pressing the trigger on the wand so the motor isn't trying to start and pressurize at the same time, so Halley is holding it towards the pool (so any extra water is saved? I'm guessing?), I start the engine, and *POP*... the tip shoots directly into the pool. We both look at each other for a few minutes... and I facepalm harder than I ever have before... We now laugh about this and reference one of the finest home shopping network fail videos...now it's locked.
Found it!
The power washer came with other tips fortunately, so we pushed forward.
Matt pressure washing
Halley pressure washing
After finishing with the power wash the concrete really did look a ton better.
Before after comparison
Looks so much better
That night I decided to take a picture of the pool with our awesome led flood lights. Our pool looks like its lit by football stadium lights at night so we can fully see the terrible state of the grass.
Late night pool party anyone?
Saturday we decided to hit to local pool place and pick up a test kit, and whatever other junk we needed to make the pool less terrible. The test shows that everything looks fine (for the things it tests for at least)
Pool test looks good
We decided to have the pool place do a test as well, and they found a bunch of stuff wrong... maybe we're getting taken for a ride...but the salespeople are really nice, they even let molly come in the store :) and...we have no idea what we're doing, so we need to trust someone. We also picked up a solar thermometer for the pool.
We completed our last coat of joint compound and a final round of sanding. I am not sure a professional would call it "done" but someone riding by on a horse wouldn't notice our errors. In consulting my brother, John, for advice he gave me sage advice: "if your gonna do it you may as well do it right." I laughed really hard when I read this. We're not trying to do this poorly, but it certainly does seem like amateur hour around here sometimes. For our next drywalling adventure, I would much rather hire out the work than spend forever and a day dealing with. To prep for the next step, we threw some primer on the fresh drywall and mud.
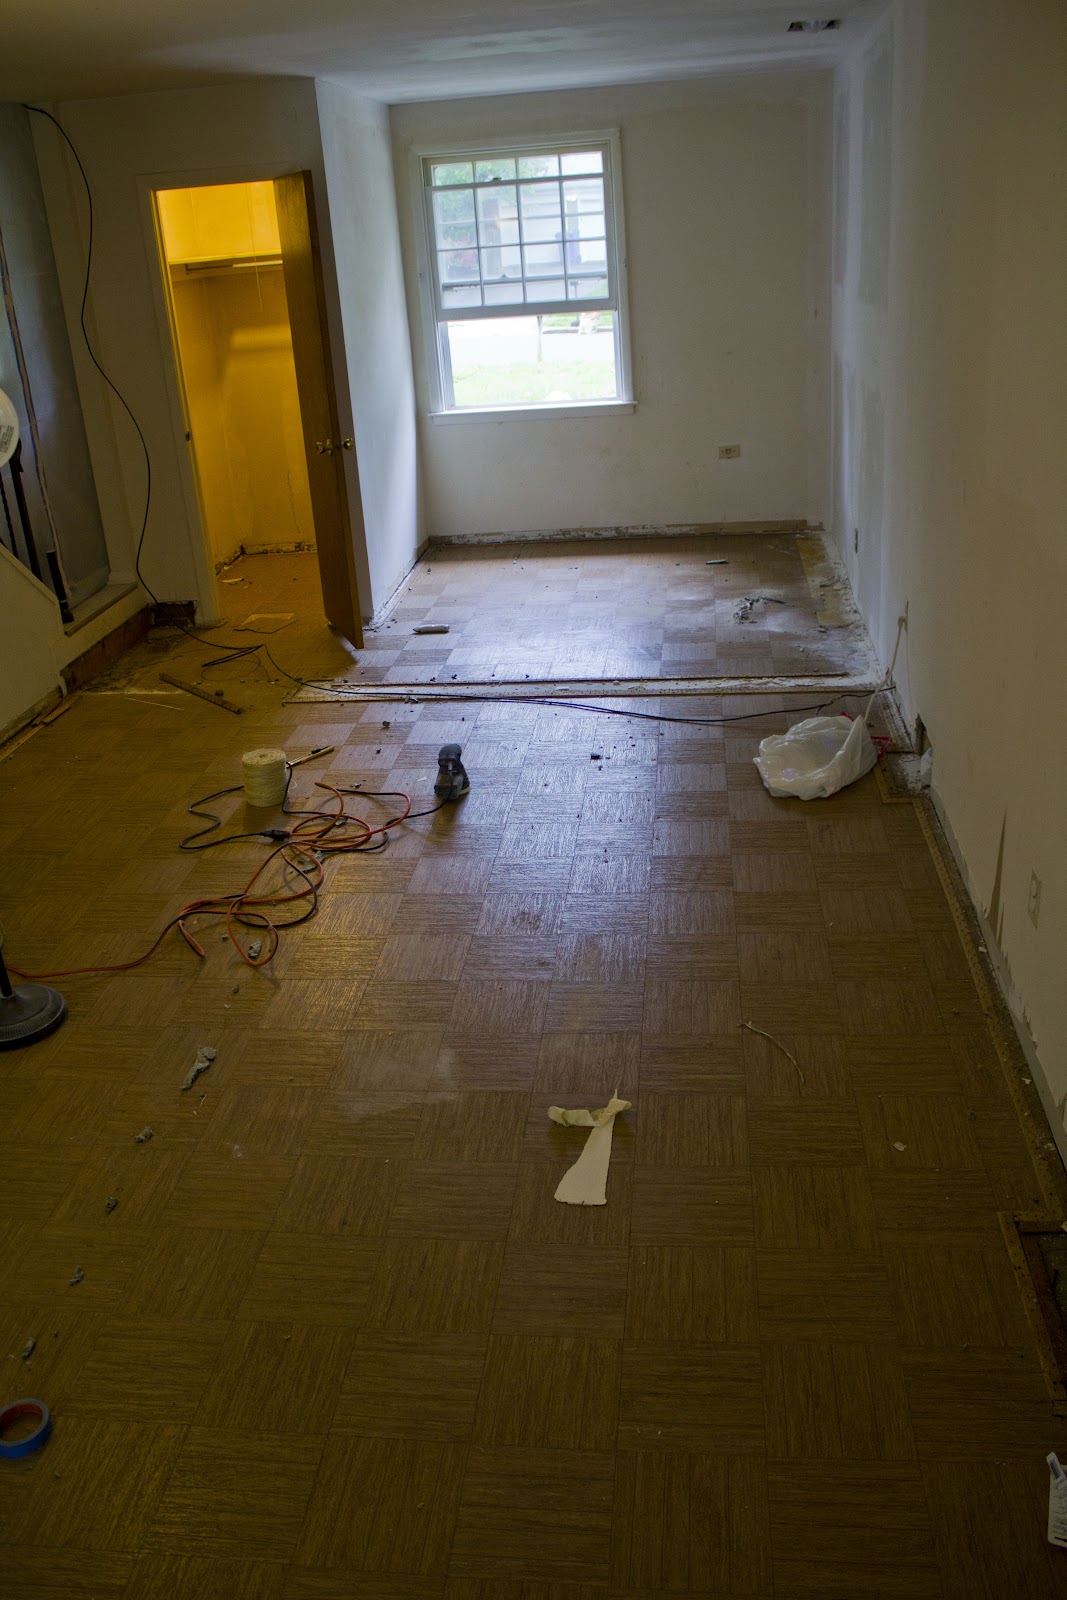
Yeah, we have had asbestos...what's it to ya?
Halley, stayin' alive
I packaged up some tile samples from the Pit and laundry room to have the tile and adhesive tested for asbestos. The tiles were non-friable 10% chrysotile, the most common form of asbestos. I started panicking, Matt remained calm and started research on the interwebs. If you're going to have asbestos in your house, vinyl asbestos tile (VAT) is the form you wish for. It is certainly something to be careful with, but the removal process was not too difficult. I phoned the Bucks County PA Dept. of Environmental Protection and he put my fears at ease. Homeowners are able to remove their own VAT (no permit required) and it can be incorporated into the regular waste stream.
Matt, being a sad panda
Prepping the room
We prepped the room by emptying it completely and taping ourselves into in with with plastic sheeting. The vents and outlets were all taped up and the HVAC system was turned off. To keep the asbestos off of us we used goggles, respirators with cartridges rated for asbestos, gloves, tyvek coveralls and of course, booties. Once all the prep work was taken care of, the removal process was quite simple. We sprayed the area we were working on with "amended" water (which just mean there's a bunch of dish soap in it) and then used putty knives to pry under the tiles and pop them off. We had an interesting surprise concerning the strange wall bump-out that required the stupid drywall operation. For some reason, this wall bump-out was built (perhaps at all?) on top of the tiles. The tiles were bagged, bagged again and sealed. Before we opened up the containment zone we collected all the debris from the floor, wiped down all the surfaces and mopped. When we were ready to break the seal, we ran outside and ripped our masks off to get fresh air. From start to finish the process took about 3.5 hours. Glad to be done with that mess. At some point we'll tackle the laundry room/powder room and perform the same operation there, so after that we'll really not have any asbestos.
The dirt line represents the edge of the
bumped-out drywall...previous home owners
were real dingbats
Molly, trying to get through 2 layers
of plastic....to help?
Dancing about, post asbestos removal and post
shower, I think "Bare Necessities" from Jungle
Book is playing in my head for some reason. Molly
is happy to join us on the other side of the plastic
Moving forward
We've finished our first all-over coat of oil-based primer. After some research I found that using an oil-based primer will prevent the underlying layer of wallpaper from peeling off the walls. Once this has encapsulated the awful wallpaper, we can pressed on with spackling and sanding the wallpaper seams. We are hosting Mother's Day for both out families next Sunday, so there are a few key steps to get finished:
Sand the wallpaper seams
Another coat of oil-based primer all over the place
Ceiling paint, on the ceiling
Paint the walls
Put up crown moulding
Pour the self leveling concrete
It crossed our minds to try to get the tiling done before then...but with two full time jobs it isn't going to happen. We should also try to make a larger dent in our unpacking. This was a hard week (see Matt's post) but we really got a lot done over the weekend. Slow, but steady, progress.


.JPG)


