It's been a while since our last update, which isn't to say we haven't been busy but that we haven't finished anything yet. We were faced with the strange complication of the ceiling in the former office being higher than the rest of the room and the wall being bumped
in a little. Matt consulted with his co-worker Jim Schmidt and I badgered fellow graduate student Brian Ell about what we should do. Everyone seemed to think that ripping down the existing drywall, adding to the depth of the studs/joists and then re-
drywalling was the appropriate plan of action. Cut to Matt and I mid-
drywalling and cursing at life a few days later...but I digress.
Termites
When we did our home inspection we found evidence of an active termite infestation. A big part of our contingencies for the seller were
killing all the termites and
repairing any structural damage they caused. So when we opened the wall and found this nonsense, we weren't too surprised but it was still scary to see.
It appears that the paper backing of drywall is super delicious. We haven't found any live termites in all the rooting around we've been doing. To make sure the studs/header/footer were still solid we pounded on them with hammers quite a bit. This is probably the caveman equivalent of what a professional might do. So no one worries, we do have a contract with a termite company that we'll keep up with.
Furry Creatures
Once the drywall on the walls was down, we started in on the ceiling. I am extremely thankful that we were wearing goggles and masks when we did this. Upon removing the first panel we were showered in years of mouse poop.
Cringe. After I stopped running in circles beating the poop off of me, we carefully finished the job. We pulled the out of date insulation also which was bagged. We noticed that a larger critter had likely been visiting the house at some point.

To support our idea that this is damage from a squirrel, we had been finding acorns in the insulation we pulled out of the wall. I have been referring to the animals as "mouse and
squir-ell", pronounced like the
villain from Rocky and Bullwinkle, or as my brother called him "Billwinkle." Once all the terrible horrible insulation was down, we added some upgraded insulation (R19) even though the wall/ceiling are interior.
 |
TK, who I bother all day by
g-chatting about building
plans and design. |
Drywall
The people who put up drywall on TV are magicians or there is trick photography going on. It is really difficult. My friend TK (real name Katie, but she'll always be TK thanks to rugby), an interior designer who works at an architecture firm, said drywall is no joke and wouldn't hold it against us if we tapped out on the project. To start, we made a dead-man to support the drywall pieces
for the ceiling, which looks like a gigantic T. We spent no less than 45 minutes trying to properly cut and install a single piece of drywall on the ceiling. The evening ended with no drywall installed and
us thinking about looking on Angie's List for a drywall installer. The next day at work I got encouragement from Brian again, that jerk, to keep trying and a promise he and his wife would help us.
 |
Brian and Lina Ell at their Summer
2011 weddin' |
With a batch of chili started in the crock pot, Brian and Lina arrived for a Sunday of drywall. I don't know how we would have ever done this without their help. Matt and I used an...
.unconventional (?) technique to align the bumped out studs in a single plane. We used a laser level and shined the beam across the length of the wall to where the studs would hit the floor/ceiling. Turns out, this is not the ideal use of the level and
it's most accurate with the beam parallel to whatever you're doing, not perpendicular (how we were using it). This resulted in one stud being off by at least 1/2" from the surrounding studs. There was much cursing and removing the drywall panel and adding shims and putting the panel back
on...at least 5 times. Matt and Brian did the drywall portion of the work, with Lina and
I as support staff. Once it came time for the taping and mudding, Lina and I took over because we know what we're doing and we do this all the time...what?
 |
| Lina and Winter, supervising |
 |
| Brian, saving our lives |
 |
| Matt was impressed with his own arm size here, take note |
 |
| Cutting the hole for the HVAC vent, sporting another nerdy shirt. |
 |
| A few more coats to go |
 |
| Loitering after a job well done! |
Asbestos Bonanza?
Our plan for this room is to remove the carpet, pad and then the layer of tile to expose the concrete slab. We'll then apply leveling compound and tile over it with super non-slip tile that will hide dirt. Not so fast though. We didn't really get a good look at the underlying tile until today, and it looks quite suspect in the asbestos department. While fiddling with it I had my respirator on, not to worry. It is brittle, but doesn't qualify as "friable" which you always worry about with asbestos containing materials (ACM). Friable means that the material can be crumbled or pulverized using hand pressure, thus releasing fibers into the air...this does not apply to our tile, or historically to vinyl asbestos tile. More info
here, we suspect we are category I, non-friable. The tiles
are quite poorly adhered to the floor and we've popped some off accidentally already. Step one is to send a sample away to be sure of what we're dealing with. Assuming it is asbestos, we are going to remove the tile using precautions prescribed by the state of PA, and probably more because I can be a little type A about these matters. I am forecasting hearing a lot about how this may be a bad idea. How I approached the situation prior to any research was "
lets dig a bunker and hide until some professional shows up to handle this for us." After researching with Matt, this is something we can do specifically due to the nature of the tile.

Aaaand if it's not asbestos containing...
.hooray for us!
So a lot has been happening around here, and there is still a lot more to do. This week I will go into Home Depot and attempt to haggle with them for a discount on the tile. We are buying enough to cover all area's of the first floor that we'll be remodeling (the Pit, laundry room, powder room, foyer and kitchen). The tile is neutral enough to go with whatever wacky colors we put on the walls. Speaking of colors, Behr is much better at describing them than I am. I was thinking of a "warm mud" type color...the color that Behr calls "pumpkin toast." I doubt I can ever work in their color naming department. Here are some choices, feel free to respond which the one that looks nicest on your monitor.
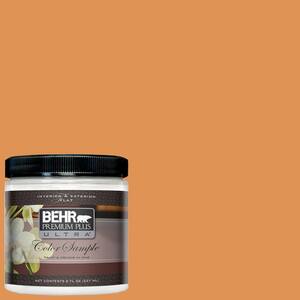 |
| A. Pumpkin Toast |
 |
| B. Flaming Torch |
 |
| C. Marmalade Glaze |
 |
| D. Amber Glow |
We like bold colors, so what? More to come as we continue getting our act together.


